
Roof leaks can cause a lot of damage like water spots, weak structures, and mold if they aren’t fixed quickly. These leaks usually happen because of damaged shingles or old flashing around chimneys and skylights. It’s important to patch a roof leak to stop more problems. Even if you’re new to DIY, you can learn to fix small leaks by patching holes and sealing flashing to keep your home safe.
This guide will teach you how to spot a roof leak, what materials you’ll need to fix it, and how to repair leaks on various roof types. Whether you’re dealing with shingle roofs or flat roofs, this guide has solid advice. Plus, it gives you tips on how to prevent leaks and maintain your roof to make sure your home stays safe and dry.
The First Step to Patch a Roof Leak Is Identifying the Source of the Leak
To find out where a roof leak is coming from, start by checking the most common places and signs of damage. Here’s a structured approach to help you pinpoint the issue:
Step-by-Step Inspection Process
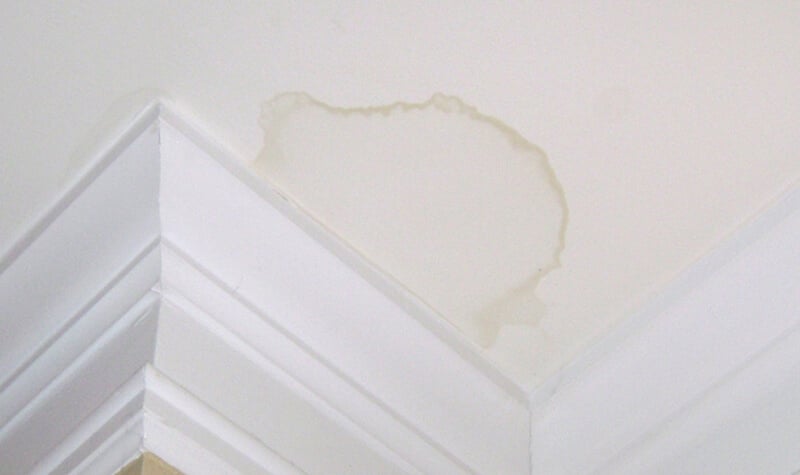
- Initial Signs:
- Look for water stains, mold growth on ceilings, walls, or the roof itself.
- Notice musty odors which are often indicative of mold caused by moisture.
- Interior Check:
- Exclude interior sources like piping or HVAC units by checking for leaks from these systems.
- Inspect your attic for wet insulation, mold, or rusted nails which suggest water penetration.
- Exterior Examination:
- Check the roof, especially near vents, chimneys, and skylights, for any areas where water might collect or where there is damage.
- Check shingles for any that are broken, loose, or missing, and examine the flashing for cracks or breaks.
Advanced Identification Techniques
- Hose Test: Carefully use a hose to spray water on your roof, section by section, to observe where water might be entering.
- Matching Inside with Outside: Look at the water damage inside your house and compare it to spots on your roof. Figure out where the leak might be coming from outside.
Professional Assessment
- If you can’t figure out where the leak is or the damage seems bad, it’s smart to ask a roofing expert for help. A professional can give a detailed check-up and make sure all possible leak spots are found and fixed properly.
By using this step-by-step method, you can find where a roof leak is coming from and figure out how to fix it.
Gathering Necessary Materials Required to Patch a Roof Leak
To ensure a successful roof leak repair, gathering the right materials is crucial. Whether you’re dealing with asphalt shingles, metal roofs, or flat membranes, having the appropriate tools and materials on hand will streamline the process and enhance the durability of your repairs.
Materials for Various Roof Types
Asphalt Shingles
- Shingles: Replacement shingles should match the existing ones in type, color, and style.
- Nails: Use galvanized or steel nails coated in zinc, suitable for asphalt shingles.
- Roofing Cement: Henry 209 Roofing Cement or a similar product is recommended for stopping leaks effectively.
- Underlayment: Provides an additional layer of moisture protection.
- Flashing: Essential for securing joints and preventing water accumulation.
Flat Roof Membranes
- Roofing Membranes: Options include EPDM, TPO, or PVC, which provide a watertight seal.
- Roof Coatings: Elastomeric or silicone coatings can be applied over the entire roof surface.
- Polyester Fleece: Cut to size for the repair area, used with adhesives like Super Silicone Seal.
Tools and Safety Equipment
- Basic Tools: Hammer, flat bar, utility knife, and caulking gun.
- Roof Top Safety Kit: Includes a safety harness to ensure safety while working at heights.
- Clean-Up Supplies: Roll of paper towels for cleaning up any excess materials.
By preparing these materials and tools in advance, you can patch a roof leak with confidence, ensuring a robust and lasting solution to your roof leak issues.
Step-by-Step Guide to Patch a Roof Leak on Asphalt Shingle Roofs
Identifying and Preparing the Damaged Area
- Locate the Leak: Begin by identifying the starting point of the leak, marking it clearly. This is crucial for targeted repairs.
- Inspect Shingles: Carefully lift the shingle tabs to check for any roofing nails that may be poking through or decking nails that have pulled up. This step helps in assessing the extent of damage.
- Area Measurement: Measure the width of the area by counting the rows of shingles. This ensures that you cover all potentially affected areas during the repair.
Removing and Replacing Damaged Materials
- Gentle Handling: Lift the shingles gently to avoid further damage. Use appropriate tools to carefully remove the damaged shingles and any loose debris.
- Cut and Replace OSB: If the OSB (Oriented Strand Board) underlayment is affected, cut out the damaged section and replace it with a new piece. Ensure the new OSB is slightly smaller than the removed section for a snug fit.
- Set Blade Depth: When cutting the OSB, set the blade depth to slightly more than the wood’s thickness to avoid damaging the underlying roof structure.
Installation and Final Checks
- Shingle Replacement: Lay new shingles to match the existing roof, ensuring they blend seamlessly and restore the roof’s integrity.
- Examine Roof Penetrations: Check areas around chimneys, skylights, and vent stacks for damaged or missing shingles. Replace these promptly to prevent future leaks.
- Weather Damage Monitoring: Regularly monitor the roof for signs of wear such as lifting, curling, or cracked shingles, especially after extreme weather conditions. Keep an eye on the condition of chimneys, vents, and gutters to ensure they are not contributing to potential leaks.
Patch a Roof Leak On Metal Roofs In Fayetteville
Common Causes and Solutions for Metal Roof Leaks
Causes of Leaks:
- Installation and Age: Improper installation and natural aging can lead to leaks.
- Damaged Components: This includes issues with fasteners, seams, and flashing.
- Environmental Factors: Debris accumulation, corrosion, and weather impacts like ice dams.
Repair Solutions:
- Sealants and Caulk: Apply these to small leaks and seam problems.
- Patching and Panel Replacement: Address larger damaged areas by replacing panels or patching.
- Flashing Repair: Essential for areas around chimneys and vent stacks.
Professional Repair Options
When dealing with more complex issues or extensive damage, professional interventions like roof coatings or complete roof retrofitting might be necessary. Consider a Pinnacle Roofing if you’re concerned about safety, warranty implications, or if your roof system is particularly complex.
When to Contact a Fayetteville Roofing Contractor
- Extensive Damage: Large-scale damage often requires professional repair or replacement.
- Safety Concerns: Working on a steep or high metal roof can be dangerous.
- Warranty and Time: Professionals ensure repairs are done quickly and may be required to maintain warranty standards.
How to Patch a Roof Leak On Flat Roof Membranes
EPDM roofs, known for their durability, can still be susceptible to leaks over time. To effectively repair these leaks, a meticulous process needs to be followed to ensure the longevity of the repairs. Here’s a step-by-step guide tailored for EPDM roof repairs:
Step-by-Step Repair Process to Patch a Roof Leak on EPDM Roofs
- Clean the Area: Start by thoroughly cleaning the leak area on your EPDM roof to remove any dirt and debris. This step is crucial as it ensures the adhesive and sealants adhere properly.
- Apply Super Silicone Seal: Once the area is clean, apply a liberal coat of Super Silicone Seal to the area, ensuring it’s evenly covered.
- Place Polyester Fleece: While the silicone seal is still wet, place the cut-to-size polyester fleece onto the area. Press it gently into the sealant to eliminate any air bubbles and ensure it adheres well.
- Seal the Repair: Apply a second coat of Super Silicone Seal over the polyester fleece. This application seals the fleece in place and ensures a watertight barrier over the repair area.
- Curing: Allow the repair to cure as per the product instructions. This step is vital as it ensures the durability and effectiveness of the repair.
For torch-down roof membranes, a different approach is required for small punctures or tears:
To Patch A Roof Leak By Repairing Small Holes in Torch Down Roof Membranes
- Material Needed: Black Jack or a similar asphalt-based sealant.
- Application: Apply the sealant directly to the cleaned and prepped area of the hole. Use enough to completely cover the damage and slightly overlap the surrounding roofing material.
- Smoothing: Use a spatula or similar tool to smooth out the sealant, ensuring it bonds well with the membrane and there are no gaps.
By following these detailed procedures, you can effectively manage and repair leaks in your flat roof membranes, ensuring they continue to provide reliable protection against the elements.
Preventive Measures and Maintenance Tips
Regular Inspections and Maintenance So you Don’t Have to Patch a Roof Leak
- Safety and Professional Advice: Always prioritize safety when working on your roof. If unsure about the extent of needed repairs, consult a professional, as they can provide a thorough assessment and handle complex issues safely.
- Inspection Post-Natural Disasters: After events like hail storms or hurricanes, promptly inspect your roof for damage. This can prevent minor damages from escalating into more significant issues.
- Routine Checks: Regularly inspect your roof to catch potential problems early. For instance, ensure your gutters are clean and check the roof flashing and step flashing for any signs of damage. These areas are crucial for preventing water penetration and costly future repairs.
Cost Considerations and Long-term Planning
- Understanding Costs: Be aware that the average cost to patch a roof leak for flat roof repairs is around $600, but can vary significantly based on damage extent and location. Fiberglass roofs are generally less expensive to repair, whereas metal roofs can be on the higher end.
- Invest in Quality: Opt for long-term solutions and consider the quality of materials and manufacturer warranties when undertaking repairs. This ensures durability and cost-effectiveness over time.
- Professional Services: Engage with licensed and experienced contractors for any repair work. They can provide detailed estimates that include material quality, labor charges, and warranty information, ensuring transparency and reliability in the services offered.
Preventative Strategies to Extend Roof Life
- Tree and Vegetation Management: Maintain a distance between your roof and any trees or shrubs to prevent moss growth and physical damage from branches. Installing zinc strips can also deter moss and algae growth.
- Ventilation and Moisture Control: Ensure your roof and attic are well-ventilated to prevent moisture buildup, which can weaken structural integrity. Regularly cleaning your gutters and maintaining the drip edge will also help in directing water away effectively, preventing leaks and water damage.
- Regular Professional Inspections: Consider scheduling a professional roof inspection every 3-5 years. This regular expert overview can help in maintaining your roof’s condition and prolonging its lifespan by addressing minor issues before they escalate.
FAQs
1. What is the most effective method to patch a roof leak?
The most effective method for fixing roof leaks is to use roofing cement or silicone caulk. This approach is suitable for addressing small leaks on shingle roofs or repairing flashing around skylights or vent boots. You can easily apply these materials using a caulk gun.
2. What steps should be taken to patch a roof leak?
To effectively patch a roof leak, follow these steps:
- Identify the precise location of the leak.
- Replace any damaged shingles.
- Use caulk to repair any damaged areas on the roof.
- Apply specialized roof leakage products.
- If necessary, apply a tar patch to the affected area yourself.
3. Can you patch a roof leak without replacing the entire roof?
For minor leaks that are confined to specific areas, you can fix the roof without a full replacement by using a roof sealant or roofing cement. It is important to first clean and thoroughly dry the affected area before applying the sealant to ensure effective sealing and to prevent further water penetration.
4. Is Flex Seal an appropriate product for roof repairs?
Yes, Flex Seal can be effectively used to patch a roof leak on roofs. It is beneficial because it covers a large surface area and is UV resistant, making it ideal for roof applications. However, it is crucial to ensure that the roof surface is completely dry before applying Flex Seal to achieve the best results.
But If all this is too much, call Pinnacle in Fayetteville and we would be glad to come take a look!!
https://www.thisoldhouse.com/near-me/arkansas/fayetteville/roof-repair
Comments are closed